Wednesday 31 October 2012

Brake master cylinder packer


My first attempt at the packer for the master cylinder at the weekend would have worked but it looked awful, so I decided to make it again (no pics of the original bit it was horrendous - many pieces of 3mm steel plate welded together)

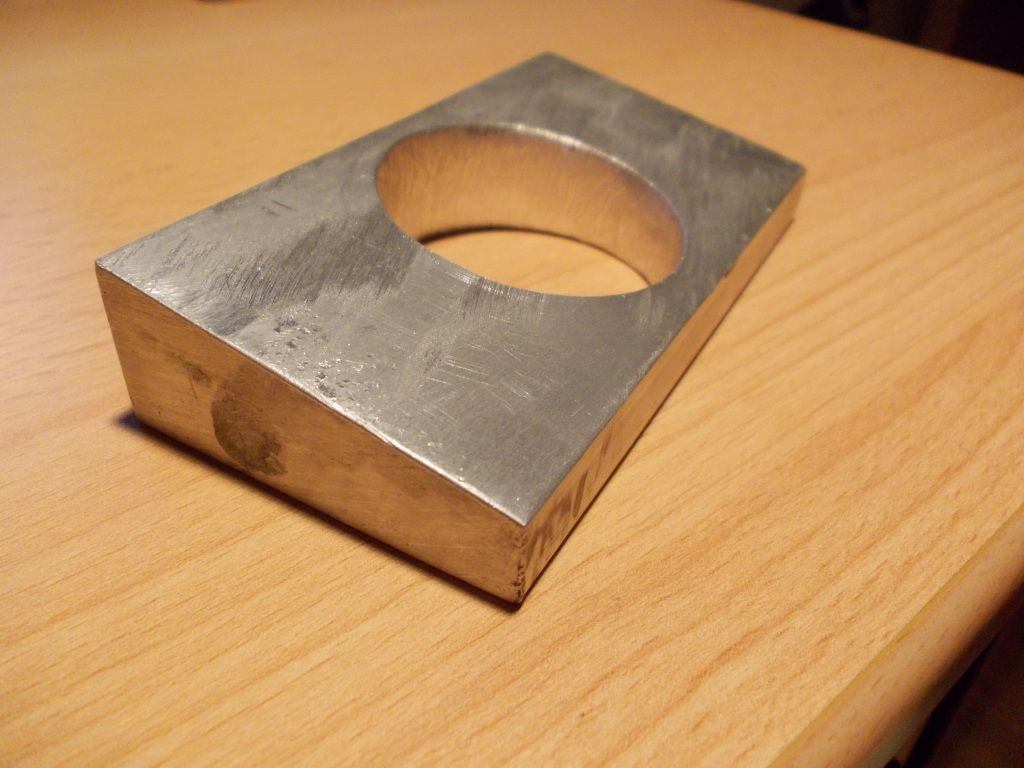
I cut a 100mm length of 50x25mm aluminium and marked it up at the right angle (approx. 12o) and cut it using a small angle grinder with a 1mm blade and a hacksaw.  Once cut I smoothed out the cut edge and marked the centre.

I drilled a pilot hole through and proceeded to cut out with a 40mm hole saw.  Once through the hole needed increasing to approx. 42mm using a half round file.

Tomorrow I will drill the two holes for the fixing bolts and hopefully get the master cylinder fitted.


Tuesday 30 October 2012

Rear suspension and fitting differential


My Fix8 order arrived!  I ordered various assorted bolts and rivnuts including some M12 x 50mm socket cap bolts.  This meant I could get the diff into position.

Continued with the nearside suspension and again fitted the caliper..

The 50 x 25 x 200mm block of aluminium also arrived so I started cutting out for the master cylinder packer by hand.  I will continue this with the angle grinder tomorrow.


I also assembled the front suspension to see what it would look like.  This will all need removing again so I didn't to the bolts up too tight.


I also had a go at fitting the front calipers.  I went for Wilwood powerlites in the end.


Monday 29 October 2012

Making a trolley, rear suspension, engine cradle


Today I welded up a trolley to sit the chassis on.  This was made from 1 inch square section with some heavy duty castors welded on the bottom.  This should make it easy to manoeuvre around in the garage where space is tight.  The top was wrapped in underlay to protect the chassis powdercoating.


I bought some silicone grease at the weekend so I dismantled the suspension I had test fitted at the weekend, applied grease to the bushes and tightened it all up.

Had a quick test fit of a front caliper too, seem to fit ok.  Hopefully will get the near side done tomorrow.  Also fixed the handbrake lever in position.

I also had a look at the engine cradle.  It doesnt look like it lines up correctly.  I will have to speak to MK.


Sunday 28 October 2012

Sprocket cover


As I am still waiting for driveshafts and various bolts, I cant really get on with the simple jobs I should be doing first.

Today I spent time painting the propshaft, trackrod extensions and trackrod ends.  I just hammerite which seemed to take well to the rusty propshaft but not so well on the bare metal of the trackrod ends.  I may have to redo these in the future.

I also sorted out the sprocket cover issue!!  I managed to get a K6 sprocket cover off eBay for £21 which has the external clutch mechanism (like the K9) but it has the same fixings as the K1.

I drilled a pilot hole in the sprocket cover, in the centre of the sprocket adapter.  Then using the pilar drill and an 86mm hole saw I cut out the hole for the propshaft.  The sprocket adapter is about 88mm so I had a bit of metal to file away with a half round file which took a while but seems to have worked ok.

I test fit the adapter and cover and there is approximately 1mm of clearance on the right side – although close it shouldn’t be an issue as there should be no movement between the two pieces.

KL9 sprocket cover - note different clutch mechanism

Hole cut through, sprocket adapter can be seen.

Painting propshaft